I hope everyone stayed safe from the storms last night! Our power went off for a few hours but, other than that, we just had lots of wind, rain and lightning. It sure made for a beautiful day today though :) 70 degree weather in January is awesome!
So, my mom finished the other dog bed today. This one is for her Yorkie, Lizzie Lou.

Such a pretty girl :)
She got this end table at a thrift store for $20 and turned it into a Paris themed dog bed and you won't even believe it's the same end table now.
Take a look :)

amazing huh!?! I LOVE it! Such a transformation.
Here's the process...
(It's close to the same process as the other dog bed she made here.)
First, she took the top part off.

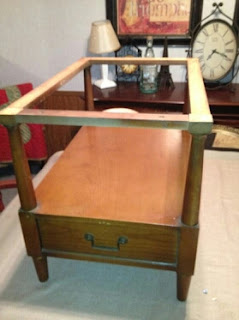
and then she took the wood off that held the top on.

She decided to use those pieces as rails to hold the cushion in so she screwed them onto the bottom platform.


(This is where the process is basically the same as the other bed)
Next, she painted it using Valspar 'Spritz of Lime'.

Then she went over it using Valspar 'Sugar & Cream' and again using Valspar 'Spritz of Lime'. She sanded it to give it the distressed look.
She bought some spindles from Lowe's to go on the posts to give it some more height and because we just felt it needed something.
She painted them using the same colors and she also added some stain so that when she distressed it, it would look like old brown wood coming through to match the rest of the bed.


The fabric came from Hobby Lobby and my mom liked the Paris theme of it so then we went to Lowe's for the paint and matched it to the fabric.

I used my cricut to cut her name and the Eiffel towers in some pink and black vinyl so it could be personalized.
Her name is from the gypsy font cartridge and I welded them together and then the Eiffel towers are from the destinations cartridge.
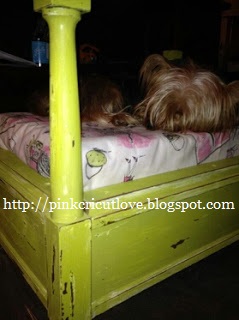
I'm pretty sure Lizzie approves of it :)
Well, I hope you enjoyed it and I hope this project inspires you :)
It really is a fun project and the hardest part is just
finding the perfect end table to use!
Thanks for stopping by! :)

Awesome job, this is too cute! I bet she loves her new bed!
ReplyDelete